This article assists users with conducting mail merges in LionMail. Although there is no built-in mail merge tool in LionMail, there exist a few different ways to send customized emails to large groups of people within LionMail and Google apps.
Step-by-Step Guide (Option One):
This is the recommended method. It uses a Google sheet and does not place a limit on the number of emails sent in one day.
- Make sure you are logged into LionMail, and then Open this file
- From the toolbar, click File and then Make a Copy. This creates a copy on your drive which you will be able to edit.

- NOTE: After copying, you may need to close and reopen the sheet once in order to see the Mail Merge menu appear
- Now, go to LionMail and create a template of the email which you would like to send
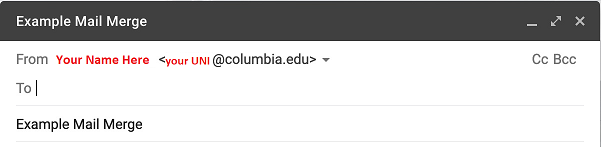
- Choose which email address to send your mail merge from by changing the From field (if applicable), but leave the Recipients field empty
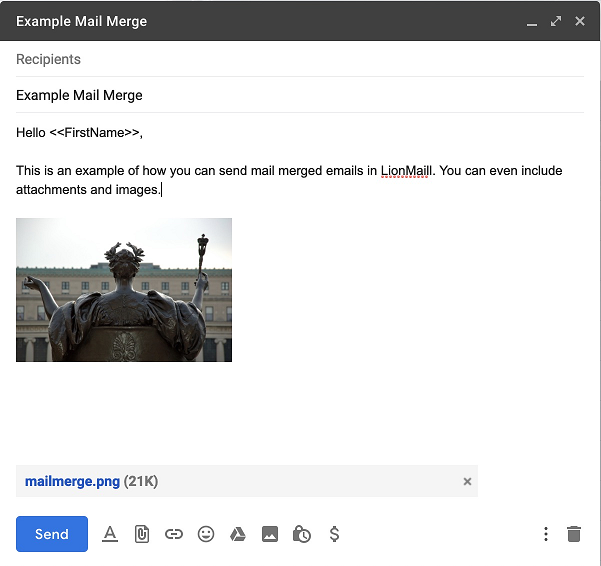
- Give your email a subject: It must be the only email in your Drafts folder with that subject
- Use Brackets (<< and >>) anywhere you want a custom entry from your spreadsheet (e.g. <<FirstName>> or <<UNI>>)
- If you want to include a photo it must be available online. Find it and copy its URL, then while in your template email, click the Insert Photo button (it looks like a picture with mountains). Select Web Address (URL) and paste your image in the field.
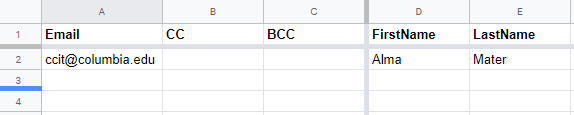
- Back in your Mail Merge spreadsheet, create columns for each bracketed variable you made in your email (these should not have brackets)
- Enter every email address you want to send you message to, and fill in the corresponding values for any variable columns you created.
- If you want to CC or BCC any of the emails, you can include those addresses in the CC or BCC columns
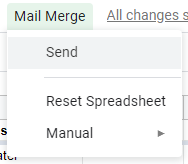
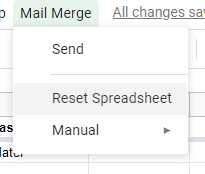
- When your spreadsheet and email draft are ready, in the toolbar click Mail Merge and then Send.
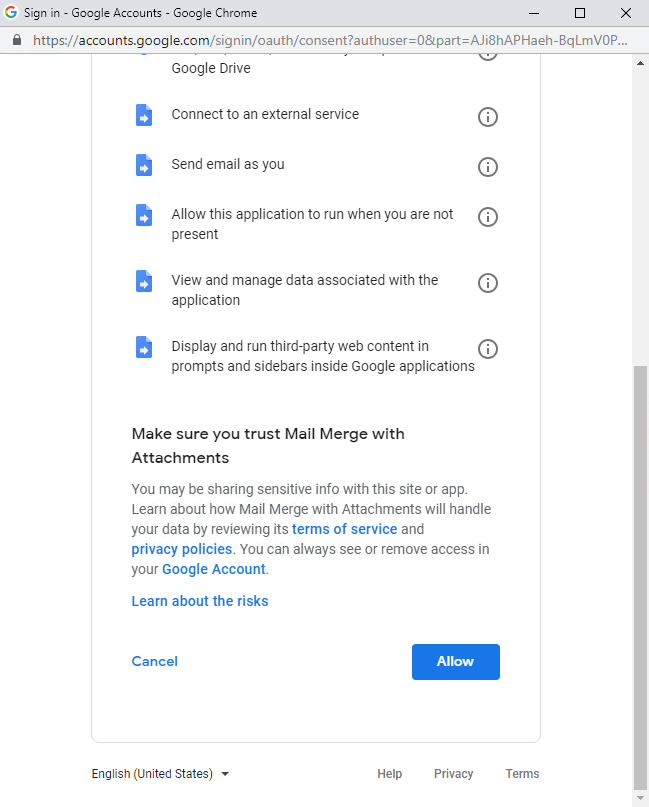
- Now, you may be prompted for authorization, and if you are please follow the steps and press Allow. If not, proceed onto the next step.
- When prompted, enter the subject of your draft email and click Ok
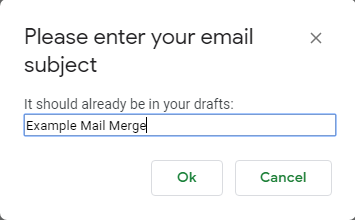
- You will then be prompted one more time to confirm your address and name. If everything looks correct, click Yes
- Your messages will be sent out. After emails are sent, addresses will be turned filled green in the spreadsheet. NOTE: don’t close the mail merge spreadsheet until the "Running Script" message towards the top of the screen changes to "Finished Script"
- You then click on Mail Merge and Reset Spreadsheet to clear the spreadsheet for a new mail merge
Thank you to SPS IT for the creation of the spreadsheet and the original documentation.
Step-by-Step Guide (Option Two):
This is the method recommended by CUIT. Using this method, there is a limit to 50 emails per day.
- Log into LionMail
- Add https://gsuite.google.com/marketplace to the URL address bar and hit enter
- In the Search field, type in mail merge and hit enter

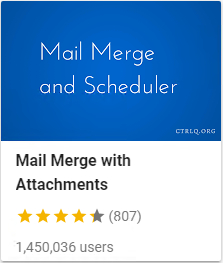
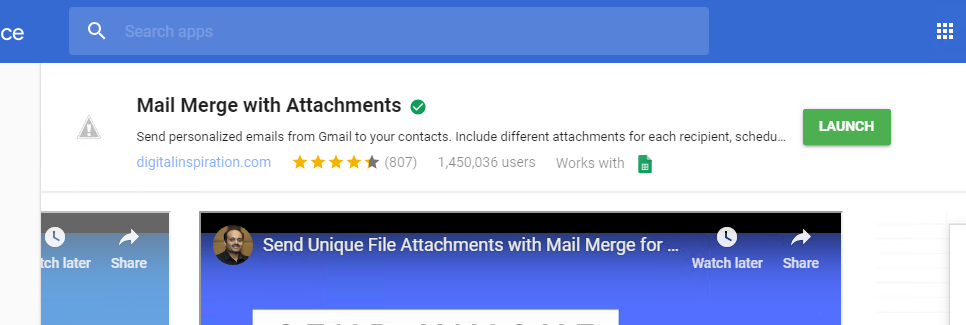
- Click on the extension titled Mail Merge with Attachments
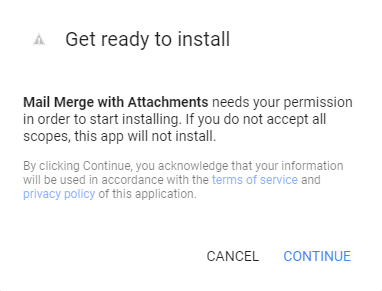
- Click on the Install Button
- Click Continue
- (If prompted) Choose your columbia.edu account
- Scroll Down and Click Allow
- Click on Next, and then Done (if prompted)
- Click on the green Launch button in the top right corner
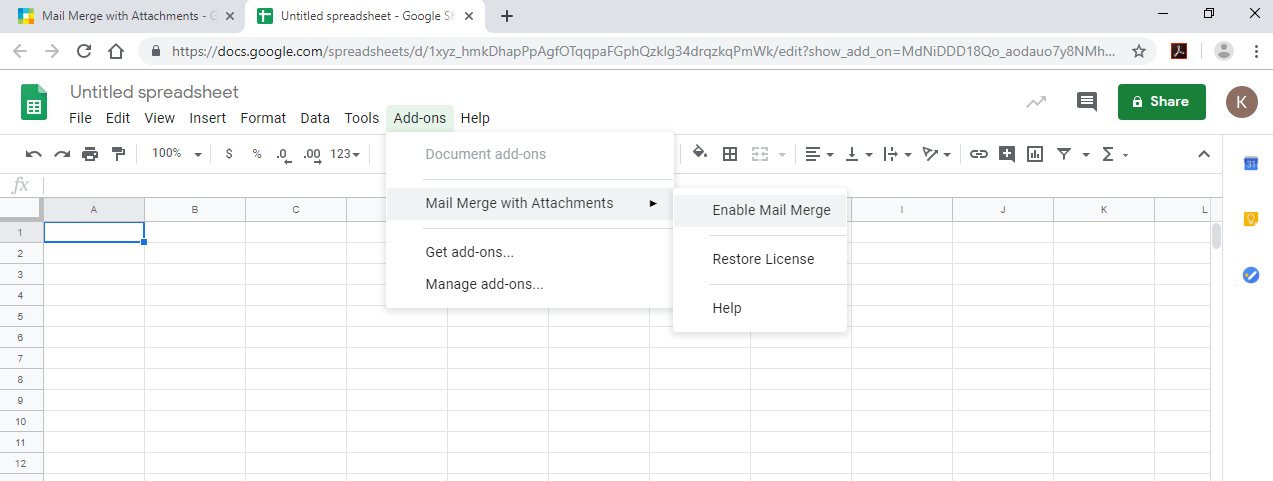
- At this point, Sheets should open, and you should then click Add-ons from the ribbon, and navigate to Mail Merge with Attachments and then Enable Mail Merge
- You may be prompted to click continue, plus you may have to choose your Columbia account again. If Mail Merge requests access, please Allow
- Now, again, navigate through: Add-ons and then Mail Merge with Attachments, and click on Create Merge Template
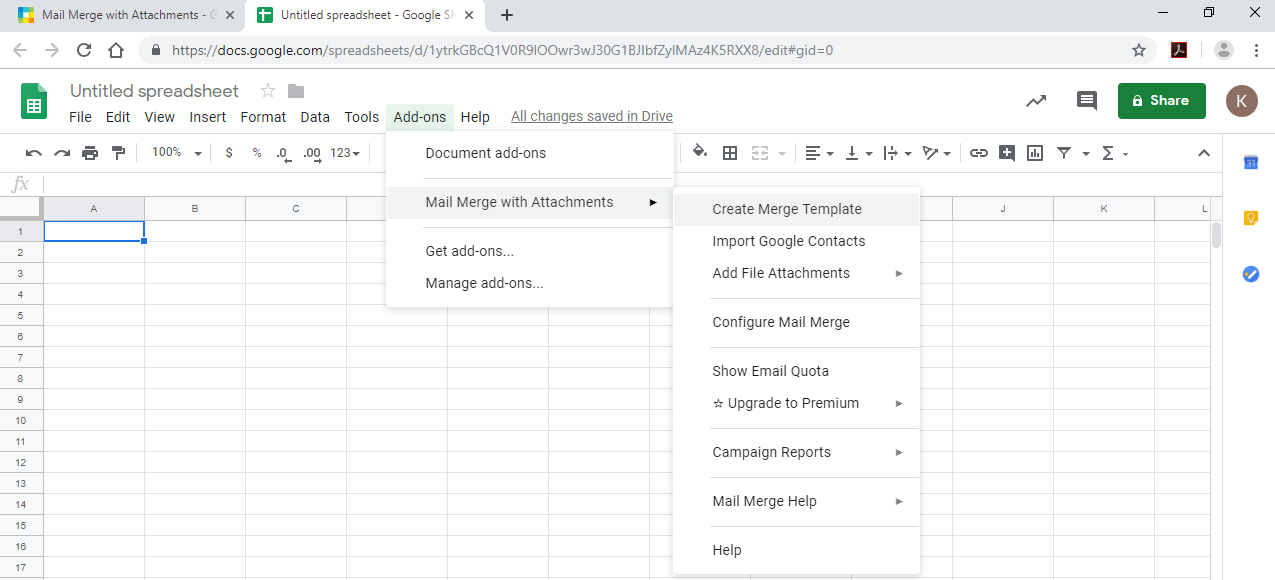
- You can now manually add the First Name, Last Name, and Email address by pasting from another source OR you can do it in bulk by choosing Add-ons, Mail Merge with Attachments and then Import Google Contacts
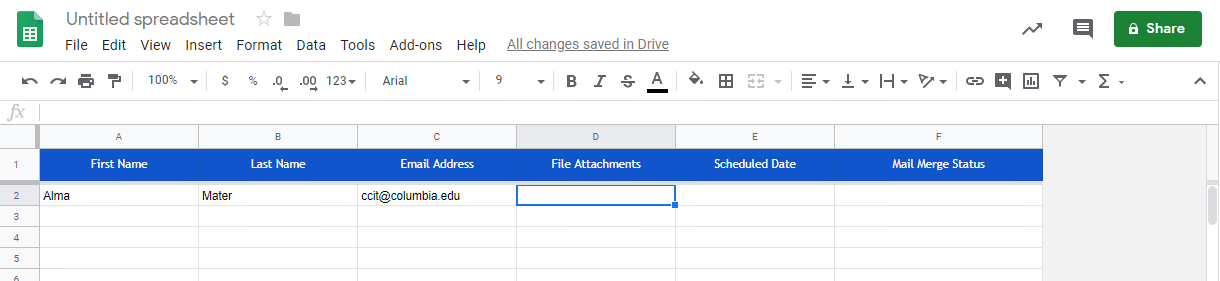
- To add a file to the respective person click on the field under the File Attachment and then Add-ons, Mail Merge with Attachments, Add File Attachment then either choose Google Drive or from Computer or Google Drive folder
- If you want to send immediately, the Scheduled Date field can be left blank
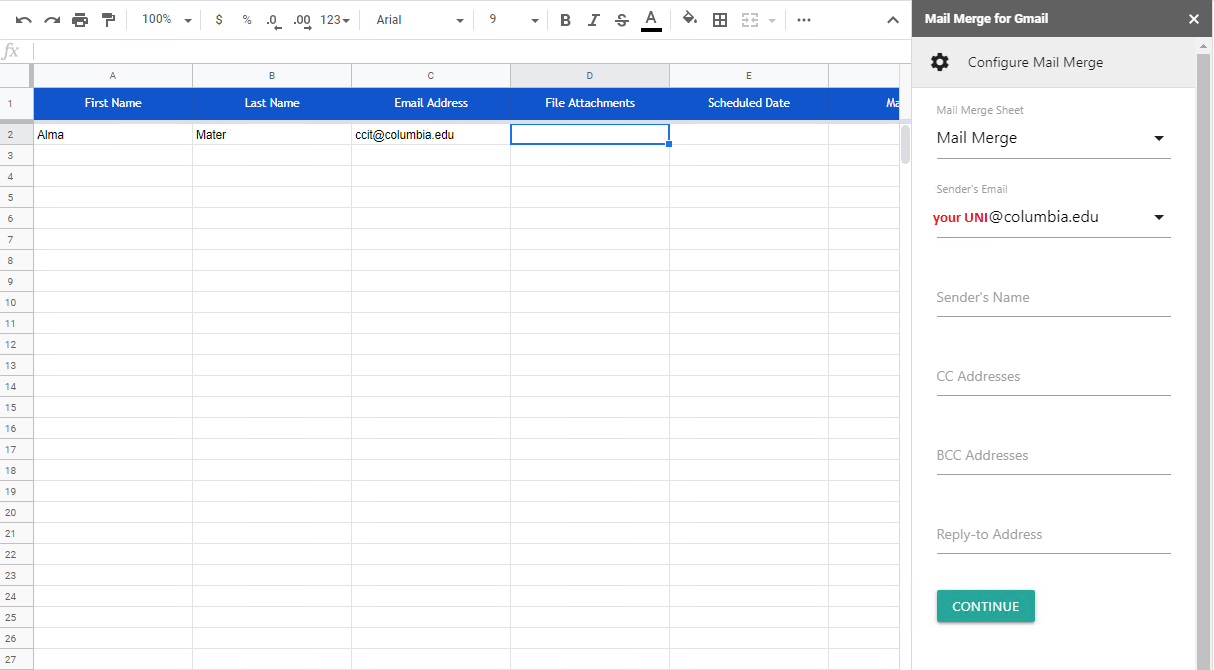
- Now click Add-ons, Mail Merge with Attachments then Configure MailMerge
- Fill out Sender Email Address, Sender’s Full Name and Reply to Address and click Continue
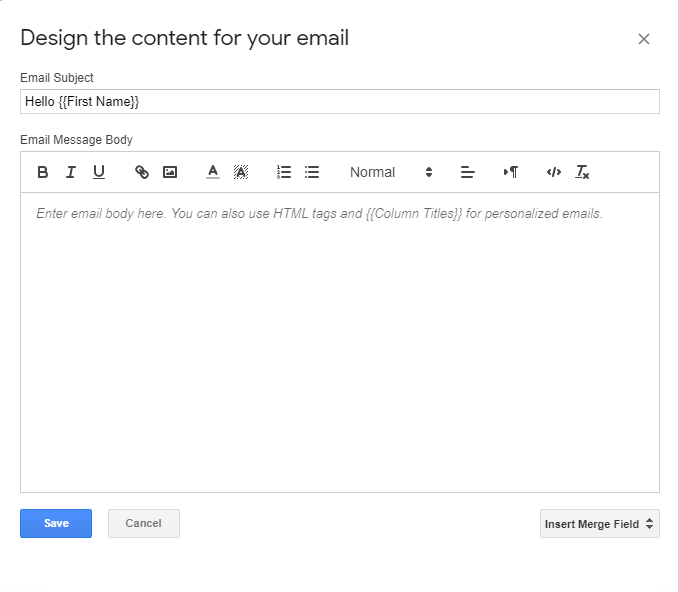
- Click on the row named Create Email Template and click on Use a Visual Editor. You can now fill in the subject and contents of your email, and then press Save and Continue.
- In the next menu, you have the option to test email, or select Run Mail Merge and Go
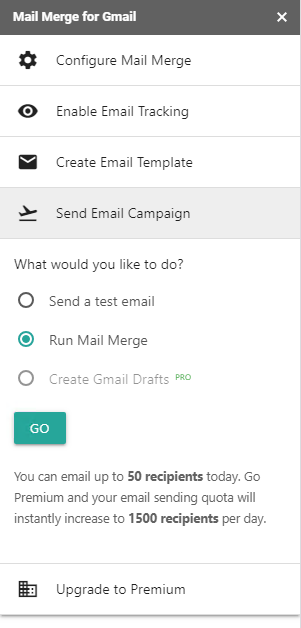
- As the emails send, a status will populate in the Mail Merge Status Column of your spreadsheet.
Included here is a YouTube video which includes more details about the process: https://www.youtube.com/watch?v=F07Py7sraDg
Type:
Functional Area:
Desktop