This article details the steps to take for mapping a CCIT administered network share on Mac systems.
You must be on the Columbia University campus network or VPN in order to access these network shares. Please see CUIT's documentation for instructions for using the VPN.
Step 1
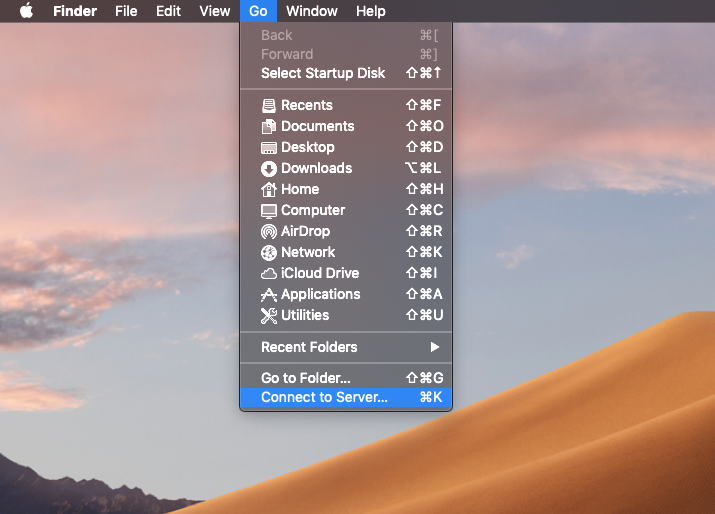
In the Finder menu bar, select the Go menu then select Connect to Server…

Step 2
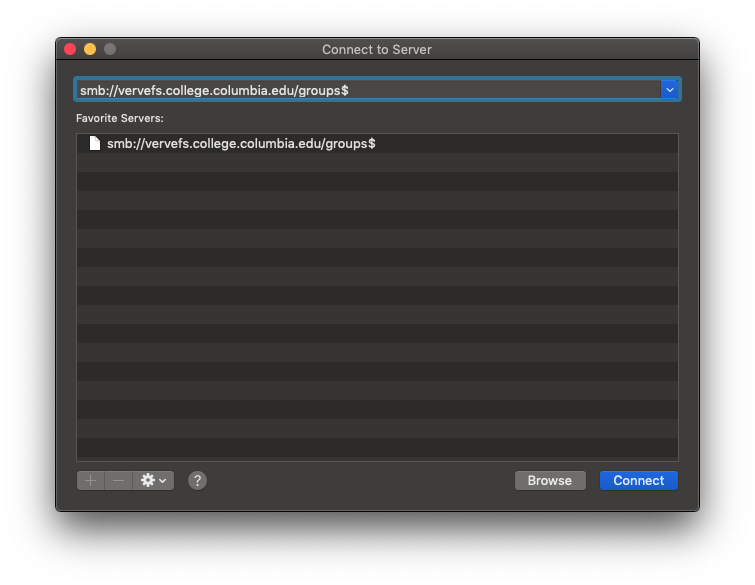
In the Connect to Server window under Server Address, enter the address of the shared drive you'd like to access.
Groups (O: Drive) - smb://files.college.columbia.edu/groups$/
Groups 2 (R: Drive) - smb://files.college.columbia.edu/groups2$/
Projects (P: Drive) - smb://files.college.columbia.edu/projects$/
Media (Q: Drive) - smb://files.college.columbia.edu/media$/
For assistance with mapping your H: Drive, please contact CCIT directly at ccit@columbia.edu.
After you completely enter the Server Address, click the + button to add the Server Address to the favorites list.

Step 3
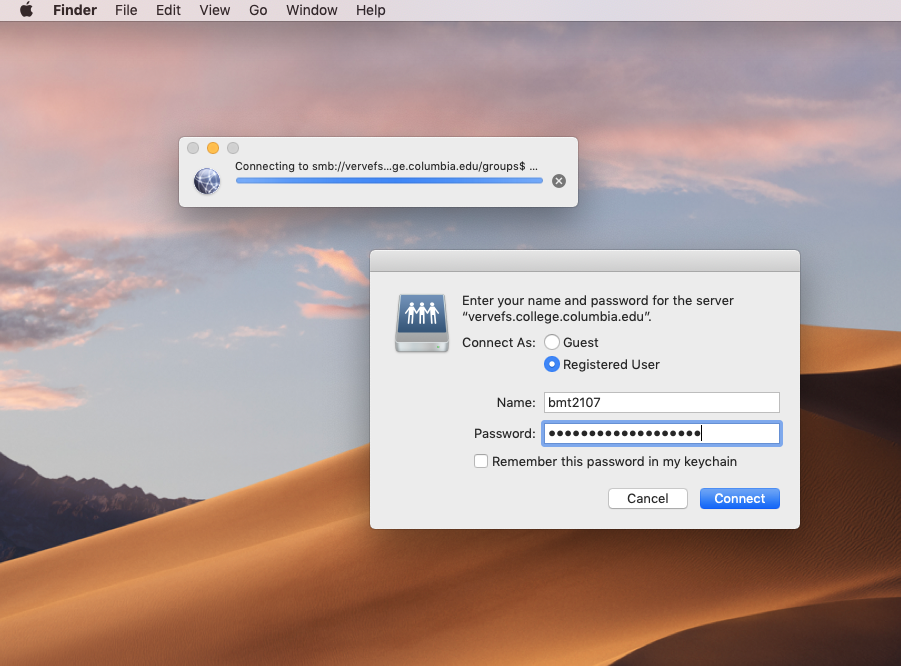
After your system finds the server and network share, you’ll be prompted for login credentials, this will be your College account.
- Connect as Registered User
- In the Name field, enter “college.columbia.edu\your uni”.
- Enter the password you created in Step 1.
- Check the box “Remember this password in my keychain”.
- Click Connect

Step 4
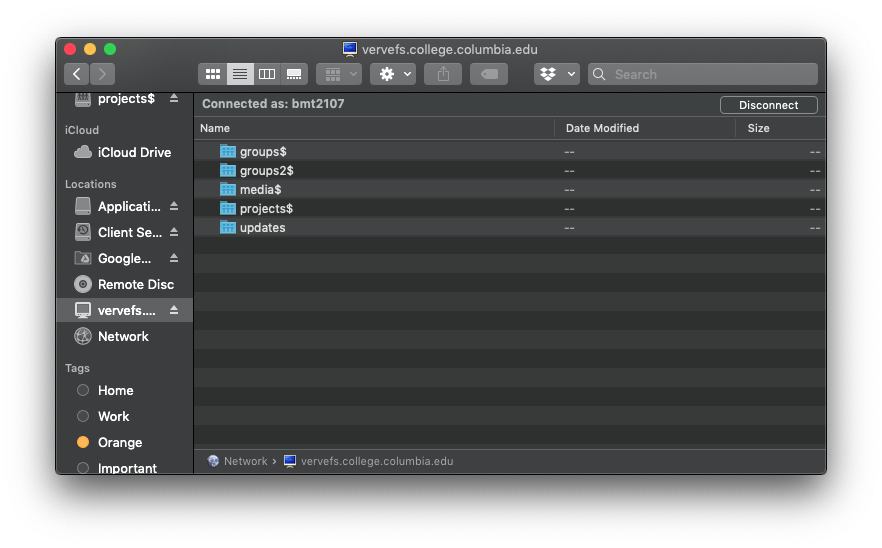
The network share will now appear within the files.college.columbia.edu location in the Finder sidebar.
